Use case 3: add local admin accounts for network devices
This use case walks through configuring automatic password rotation for local admin accounts on network devices with auto-approval for SSH sessions enabled.
Admin level accounts exist on all network devices that need to be controlled, audited, and rotated on a regular schedule. For this use case, you will import all Cisco switches (or network devices from other vendors that allow administration via SSH) and manage the local admin account. You will also grant permissions to a specific set of users who need access to all network devices.
To accomplish all of the above, you must create the following Smart Groups in the BeyondInsight console:
- An asset Smart Group for discovering the devices
- An asset Smart Group for adding the devices to Password Safe management
- A managed system Smart Group for granting system access to user groups
- A managed account Smart Group to add the local admin accounts to Password Safe management
You must also associate the managed account Smart Group with user groups, and then assign roles and permissions to the associated managed account Smart Group.
Create asset-based Smart Group to discover network devices
- From the left menu in BeyondInsight, click Smart Rules.
- Click Create Smart Rule.
- Select the Category and enter a meaningful Name and Description for the Smart Rule.
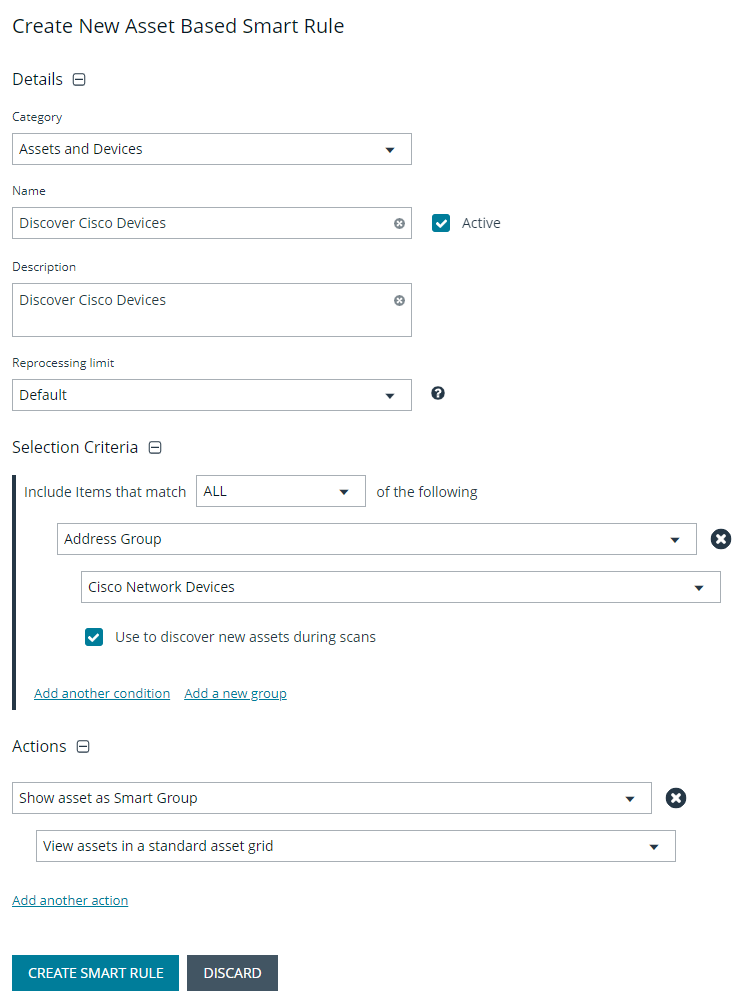
- Set Selection Criteria as:
- Address Group, <address group name>, Use to discover new assets during scans (enabled)
- Enter the interval in hours to rerun the query to ensure new servers that have joined the domain are automatically captured
- Set Actions as:
- Show asset as Smart Group, View assets in a standard asset grid
- Click Create Smart Rule.
You can now run a Discovery Scan against this Smart Group. In order to pull details, including local accounts, from each asset into BeyondInsight, execute a scan with appropriate credentials.
You can initiate a scan from the vertical ellipsis menu for the Smart Group on the Smart Rules page in BeyondInsight. You can also schedule a recurring scan to discover new assets and confirm the local accounts and services have not changed on the existing assets. This is key to a dynamic onboarding process.
Since an address group is a static list of hosts, this Smart Group doesn’t need to reprocess often -- only when known changes to the address group have been made.
For more information on configuring a Discovery Scan, please see Run Discovery Scans in the BeyondInsight User Guide.
Create asset-based Smart Group to add network devices to Password Safe management
- From the left menu in BeyondInsight, click Smart Rules.
- Click Create Smart Rule.
- Select the Category and enter a meaningful Name and Description for the Smart Rule.
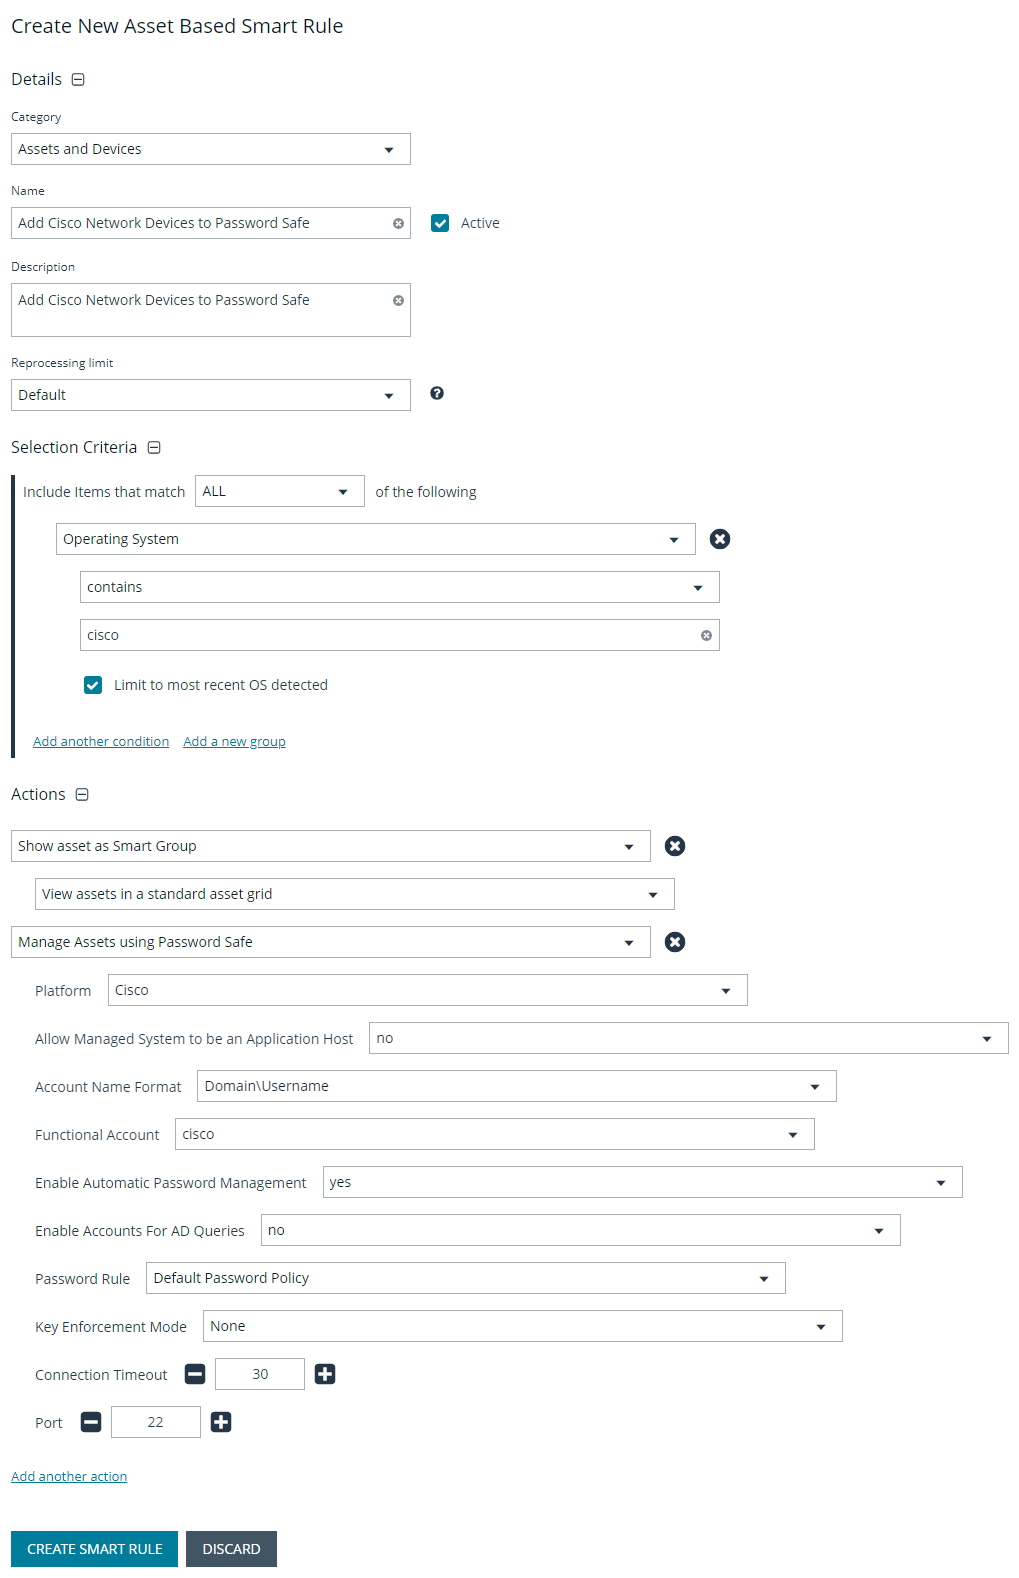
- Set Selection Criteria as:
- Operating System, contains, cisco
The Operating System criteria is used to query servers that have the same functional account. The action associates the functional account with the system.
- Set Actions as:
- Show asset as Smart Group, View assets in a standard asset grid
- Manage Assets using Password Safe, Platform: Cisco, Account Name Format: SAM, Functional Account: <functional account name>
- Click Create Smart Rule.
To ensure new servers are automatically added to Password Safe management, this Smart Group must be repeatedly processed, especially after the last scan completes.
Create managed system Smart Group for granting system access to user groups
Creating this managed system Smart Group is not always required but it helps you to group systems that have specific managed accounts associated with them and to assign asset level permissions to user groups. As the assets are added to Password Safe management, they automatically populate within the All Managed Systems Smart Group.
This Smart Group specifically looks for all network devices that are managed by Password Safe.
- From the left menu in BeyondInsight, click Smart Rules.
- Select Managed System from the Smart Rule Type filter list.
- Click Create Smart Rule.
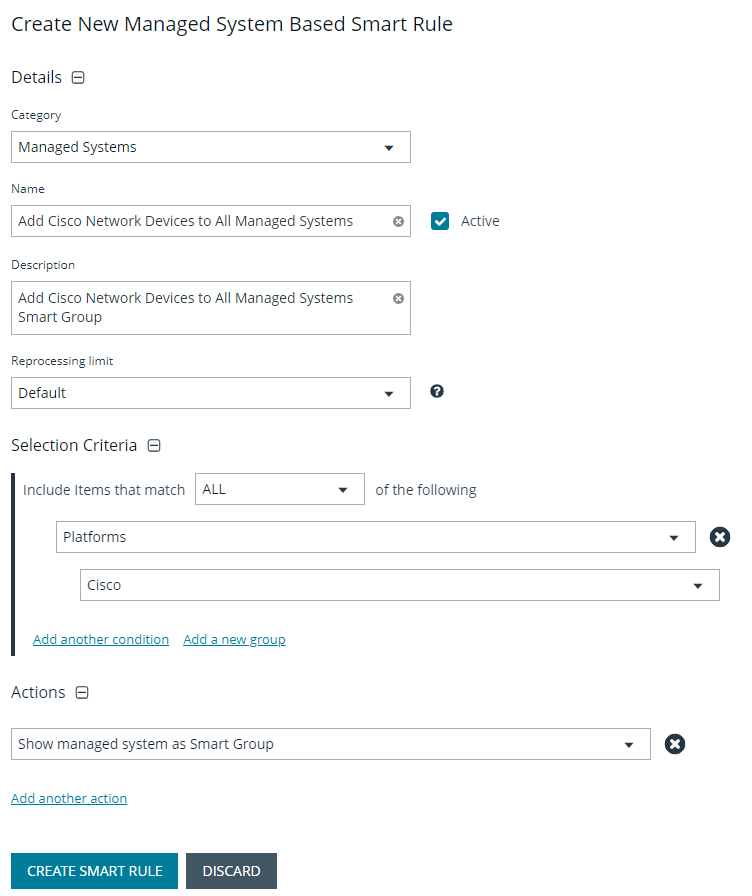
- Select Managed Systems from the Category list.
- Enter a meaningful Name and Description for the Smart Rule.
- Set Selection Criteria as:
- Platforms, Cisco
- Set Actions as:
- Show managed system as Smart Group
- Click Create Smart Rule.
Create managed account Smart Group to add accounts to Password Safe management
The initial creation of this Smart Group only has the one account name of the local admin account. After researching and reviewing reports, additional privileged account names may be added to this Smart Group.
- From the left menu in BeyondInsight, click Smart Rules.
- Select Managed Account from the Smart Rule Type filter list.
- Click Create Smart Rule.
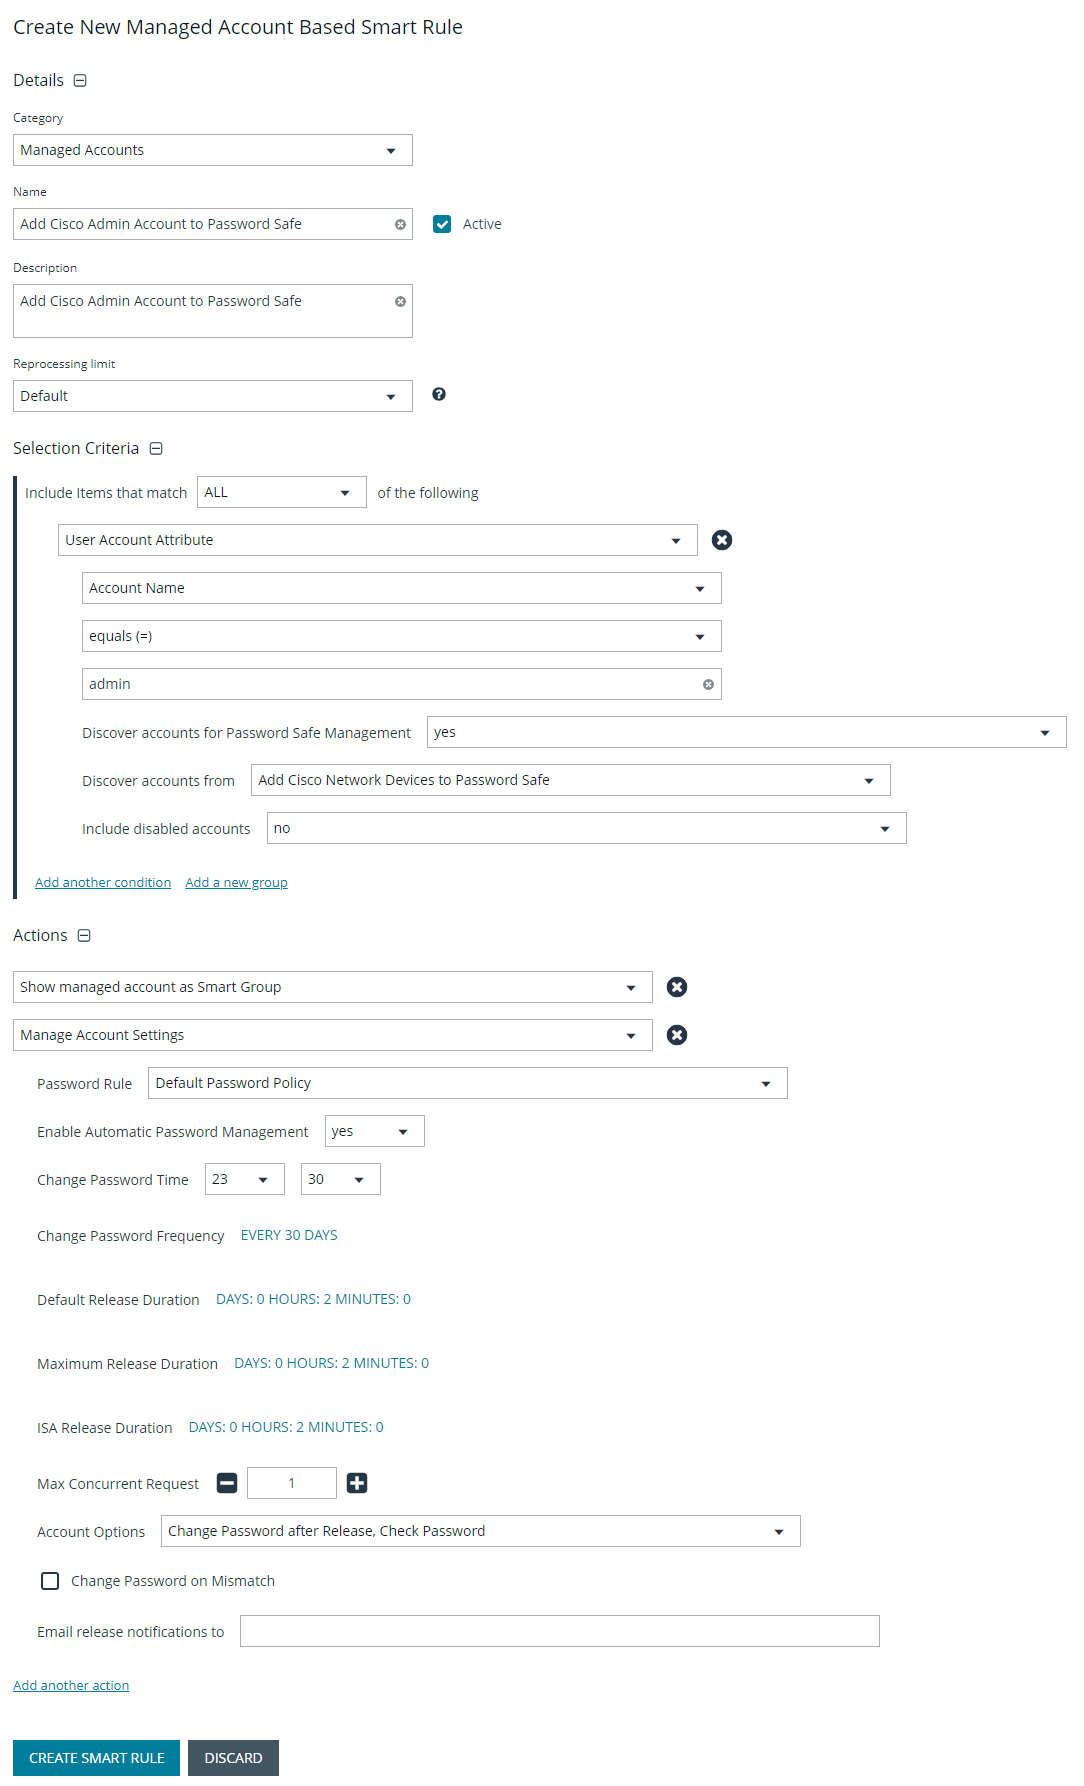
- Select Managed Accounts from the Category list.
- Enter a meaningful Name and Description for the Smart Rule.
- Set Selection Criteria as:
- User Account Attribute, Account Name, equals, <Admin>, Discover Accounts for Password Safe Management: yes, Discover accounts from: <Smart Group for adding network devices>
- Set Actionsas:
- Show managed account as Smart Group
- Manage Account Settings, Password Rule: <password policy>, Enable Automatic Password Management: yes, Change Password Time: <desired time>, Change Password Frequency: <desired frequency>
The Manage Account Settings action onboards the specific account, if found in the system’s scan results. This action also dictates whether the account is rotated immediately or not.
- Click Create Smart Rule.
Assign user group permissions and roles for account access
Associate a user group with the Smart Group that you created for adding accounts to Password Safe management, and then assign permissions, roles, and an access policy to the Smart Group. In this use case, the Password Safe users are Requestors with an access policy to allow auto-approved RDP sessions.
- From the left navigation in the BeyondInsight console, click Configuration.
- Under Role Based Access, click User Management.
- Locate the user group in the grid, and then click the More Options (ellipsis) button for that group.
- Select View Group Details.
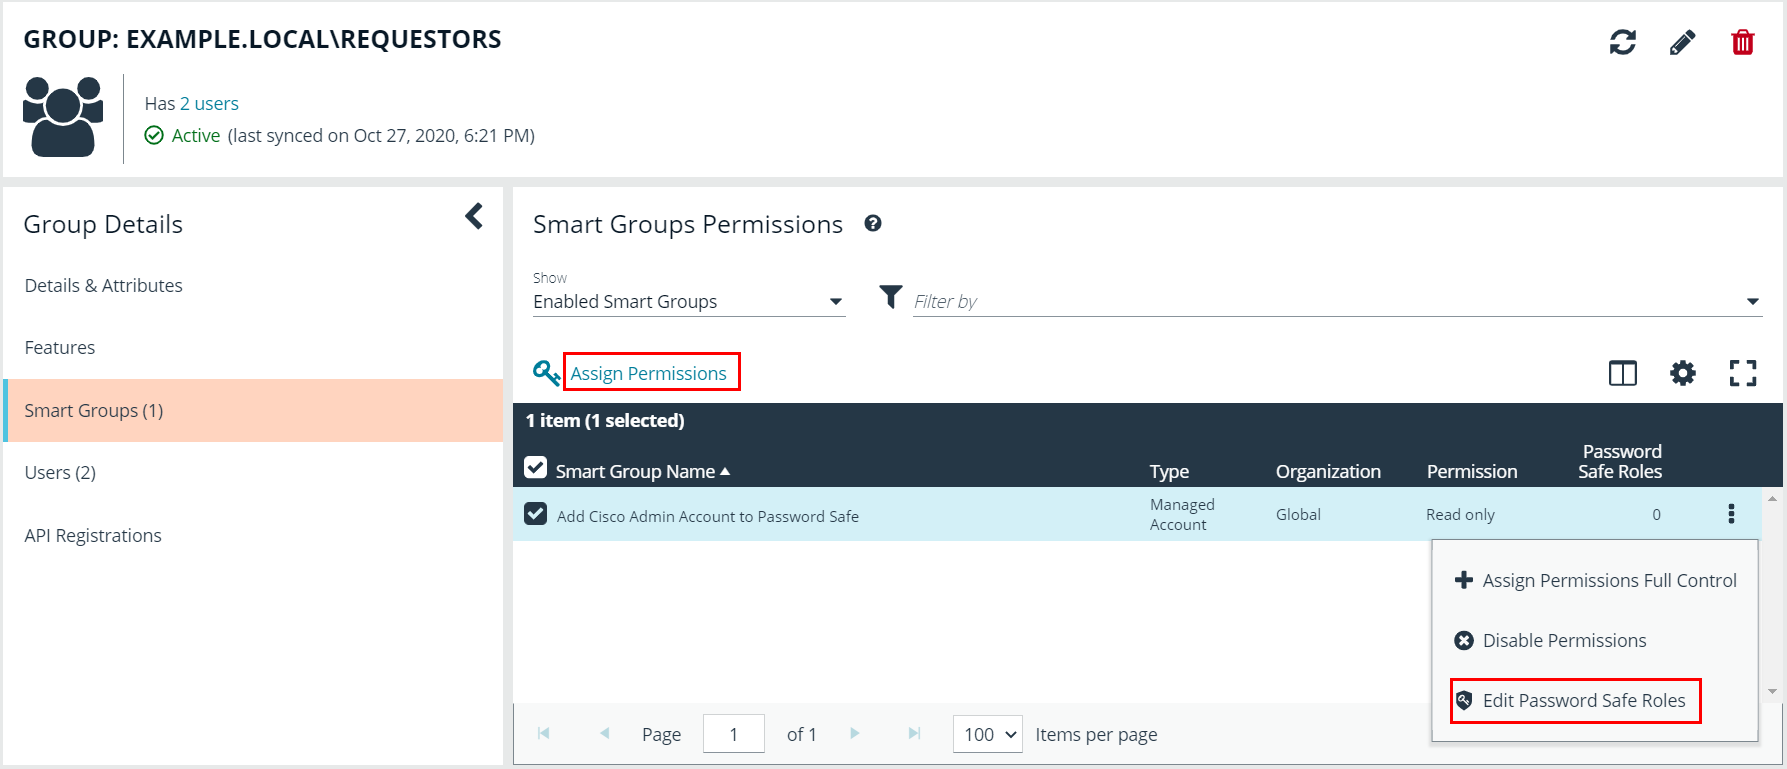
- From the Group Details pane, select Smart Groups.
- In the Smart Groups Permissions grid, select the Smart Group you created for adding the Cisco Admin account to Password Safe, and then click Assign Permissions above the grid.
- Select Assign Permissions Read Only.
- Click the vertical ellipsis button for the Smart Group, and then select Edit Password Safe Roles.
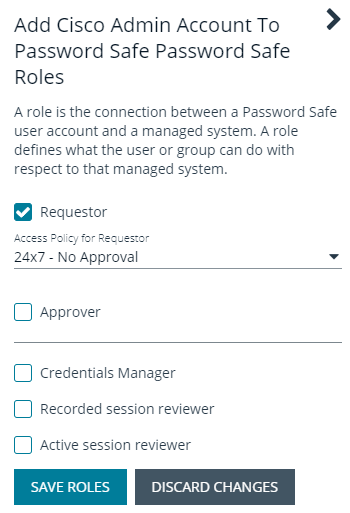
- Select the Requestor role, and then select the Access Policy.
- Click Save Roles.