Create the Jira ticket system in Password Safe
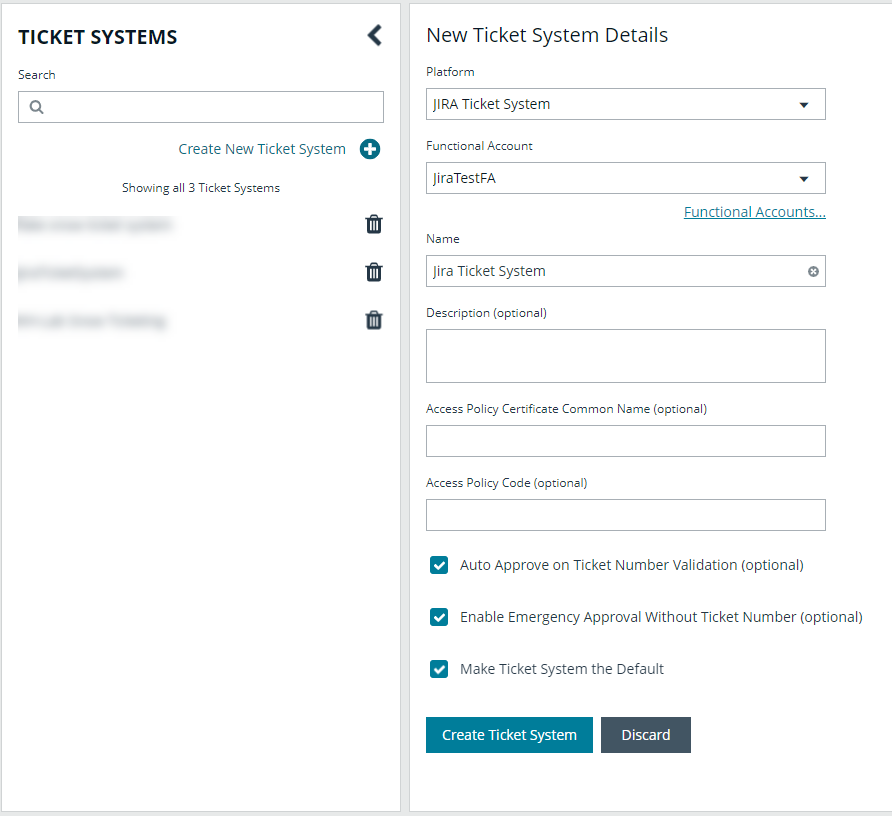
Follow the below steps to create a Password Safe ticket system, configure it with the functional account you created to access your Jira instance, and select your desired ticket approval options.
- From the left sidebar in BeyondInsight, click Configuration.
The Configuration page displays. - Under Privileged Access Management, click Ticket Systems.
The Ticket Systems page displays. - Click Create New Ticket System +.
The New Ticket System Details form displays in the right panel.
- Select JIRA Ticket System from the Platform dropdown.
- Select the Functional Account you created to access your Jira instance from the dropdown.
- Enter a name for the ticket system.
- Optionally, you can also enter a Description, Access Policy Certificate Common Name, and an Access Policy Code.
- Check the options you wish to enable:
- Auto Approve on Ticket Number Validation
- Enable Emergency Approval Without Ticket Number
- Make Ticket System the Default
- Click Create Ticket System to save it.
- The Requester is populated in the Assignee field.
- For local on-premises Jira instances, the User ID must match the Password Safe User ID.
- For cloud hosted Jira instances, the email address entered must match the email address of the BeyondInsight user.

